Winter is hard on cars. Cold air, road salt, wet slush, and low sun all wear down paint, glass, and interiors. And even if you live somewhere mild, a road trip north or a few months of heavy use can leave your car looking tired by spring. The good news is that most winter damage is easy to prevent. You just need to clean and protect the right parts before the weather turns. This checklist covers what to do, in what order, and why each step matters. It starts with the outside of the car, moves to the glass and wheels, and ends with the cabin. Some tasks take ten minutes. Others take an afternoon. You don’t need fancy tools for most of them. But you do need to do them before the first cold snap, not after. Here’s how to get your car ready for the cold season ahead.
Why Winter Is Rough on Paint, Glass, and Cabins
Cold weather doesn’t damage a car by itself. The problem is what comes with it.
Road salt and brine stick to paint and metal. They speed up rust, especially on the lower panels and underbody. Wet roads throw grit at your bumper and doors all day. Rain and humidity get trapped in carpets. And dry winter air can crack leather and fade plastic trim.
In South Florida, winter is our dry season. It’s cooler, but the sun is still strong, and pollen, dust, and salt air from the coast keep building up. So the goal is the same no matter where you drive: clean the car fully, then protect every surface that takes a hit.
Step 1: Start With a Full Wash and Decontamination
You can’t protect dirty paint. Any wax or coating you put on top of grime just seals the grime in. So the first job is a real wash, not a quick rinse.
Wash by Hand From Top to Bottom
Use the two-bucket method. One bucket holds soapy water. The other holds clean water to rinse your mitt. This keeps dirt from going back onto the paint and causing swirl marks.
- Rinse the whole car first to knock off loose dirt.
- Wash the roof, then the glass, then the hood and trunk.
- Do the lower doors and bumpers last. They’re the dirtiest.
- Use a pH-balanced car soap. Dish soap strips protection.
- Dry with a clean microfiber towel or a blower.
Clay Bar the Paint
After washing, run your hand over the paint inside a thin plastic bag. If it feels rough, there’s bonded dirt on the surface. Things like tree sap, rail dust, and overspray don’t come off with soap.
A clay bar fixes this. Spray a lubricant on a small section, glide the clay back and forth, and wipe it clean. Fold the clay often so you’re always using a clean face. When the paint feels smooth like glass, it’s ready for protection.
Step 2: Add a Layer of Paint Protection
This is the most important step on the list. Protection gives salt, water, and grime a barrier to sit on instead of your clear coat.
You have three main options:
- Wax: Easy to apply and gives a warm shine. But it only lasts a few weeks to a couple of months.
- Paint sealant: A synthetic product that lasts longer than wax, often four to six months. It handles heat and water better.
- Ceramic coating: A hard, chemical layer that bonds to the paint. It can last years with the right care.
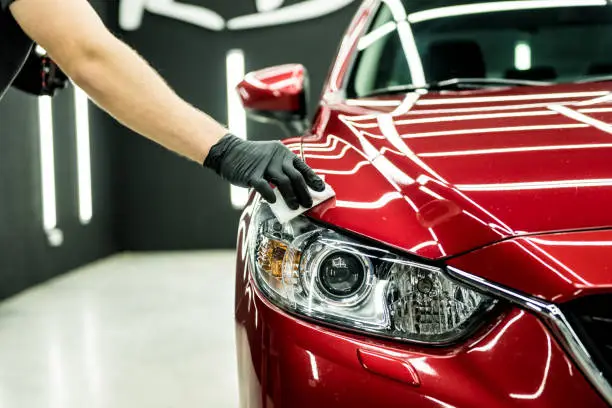
If you want something that lasts the whole season and beyond, many drivers book a ceramic paint sealant fort lauderdale service before winter. A pro will usually polish out light scratches first, then apply the coating in a controlled space. That matters, because coatings don’t like dust or direct sun during curing.
Whatever you pick, apply it in the shade on cool panels. Work one section at a time and follow the cure time on the label.
Step 3: Clean and Protect the Undercarriage
Most people skip this part. But the underside of your car is where rust starts.
Salt and mud collect in the wheel wells, frame rails, and around the exhaust. If they sit there for weeks, they eat at the metal. Use a pressure washer with an undercarriage wand, or visit a car wash that has an underbody spray. Rinse well behind each wheel and along the rocker panels.
If you plan to drive in snowy states, think about a rust-proofing spray for the underbody. It’s cheap compared to fixing rot later.
Step 4: Get Your Glass and Wipers Ready
Clear glass is a safety issue. Winter brings shorter days, more glare, and more rain or snow.
- Clean every window inside and out with an ammonia-free glass cleaner.
- Use two towels: one to clean and one to buff dry.
- Apply a water-repellent glass treatment to the windshield. Rain beads up and rolls off at speed.
- Check your wiper blades. If they streak, chatter, or skip, replace them.
- Fill your washer fluid with a winter blend if you’ll be in freezing temps.
Don’t forget the inside of the windshield. A film builds up from plastic off-gassing and breath. It causes heavy glare at night and makes fogging worse.
Step 5: Protect Wheels, Tires, and Trim
Wheels take more abuse than any other part of the car. Brake dust is hot and sharp, and it bakes onto the finish. Add road salt and it gets worse.
Wheels
Use a wheel cleaner that’s safe for your wheel type. Scrub the barrels and lug nut areas with a soft brush. Once they’re clean and dry, add a wheel sealant or coating. Brake dust will rinse off much easier all season.
Tires
Clean the sidewalls with a tire cleaner and a stiff brush. Then apply a water-based tire dressing. Skip greasy, solvent-heavy shines. They sling onto your paint and attract dirt.
Also check tire pressure. Cold air drops pressure by about one PSI for every 10 degree fall in temperature. Low pressure hurts grip and fuel use.
Plastic and Rubber Trim
Faded trim makes a car look older. Apply a trim restorer or protectant to black plastic. Treat door seals with a rubber conditioner so they don’t stick or crack in the cold.
Step 6: Prepare the Interior for Wet and Dry Weather
The cabin takes a beating in winter too. Wet shoes bring in water, sand, and salt. Heaters dry out leather. And closed windows trap smells.
Start with a full interior clean. If you don’t have the time or tools, an interior car detailing fort lauderdale service can handle deep extraction, steam cleaning, and leather care in one visit. That’s a good reset before the season starts.
Floor Mats
Swap carpet mats for rubber or all-weather mats. They trap water and grit and wash off in minutes. If you keep carpet mats, vacuum them and treat them with a fabric protector.
Seats and Upholstery
- Vacuum seats, seams, and under the seats.
- Clean fabric seats with an upholstery cleaner and blot dry.
- Clean leather with a leather cleaner, then apply a conditioner.
- Conditioner keeps leather soft so it doesn’t crack in dry heat.
Dashboard and Touch Points
Wipe the dash, doors, and center console with an interior cleaner. Use a UV protectant on the dash. Then wipe down the steering wheel, shifter, and door handles. These spots carry the most germs during cold and flu season.
Air Vents and Cabin Filter
Dust in the vents blows right at your face when the heater runs. Use a soft detailing brush to clean the vent slats. Then check your cabin air filter. A dirty filter cuts airflow, causes window fog, and makes the car smell musty. Most filters are easy to swap behind the glove box.
Step 7: Pack a Simple Winter Car Kit
Detailing isn’t just about looks. A small kit helps you keep the car clean and safe between washes.
- Microfiber towels for quick wipes
- A small bottle of glass cleaner
- An ice scraper and snow brush if you’re heading north
- A spare washer fluid jug
- A flashlight and phone charger
- Jumper cables or a portable jump starter
- A blanket and bottled water
Keep it in a bin in the trunk so it doesn’t slide around.
Step 8: Keep Up With Maintenance Washes
Prep is only half the job. The other half is keeping it up.
Wash your car every one to two weeks during winter. Do it more often if you drive on salted roads. A protected car is easier to wash, so this goes faster than you’d think. Use a pH-neutral soap so you don’t strip the sealant or coating you just put on.
Rinse the undercarriage each time. Wipe salt off the door jambs. And vacuum the cabin often so sand doesn’t grind into the carpet.
At the end of the season, do a quick inspection. Look for chips, scratches, or spots where protection has worn thin. Fix those before spring.
Frequently Asked Questions
How early should I prep my car for winter?
Aim for late fall, before temperatures drop or salt hits the roads. Most paint products need mild temperatures to cure well.
Is wax enough to protect my car in winter?
Wax helps, but it wears off fast. A sealant or ceramic coating lasts much longer and holds up better against salt and rain.
Can I wash my car when it’s cold outside?
Yes. Just wash during the warmest part of the day and dry the car fully, including door jambs and locks, so water doesn’t freeze.
Do cars in Florida need winter detailing?
They do. Florida winters are dry, sunny, and dusty, and coastal salt air is constant. Protecting paint and interiors still pays off, especially if you travel north for the holidays.